Intro
Check out the other parts for our How to Create an AR Shoot’em Up Gallery Game here:
In the previous tutorials within this series (Part 1 and Part 2), we learned how to:
- setup Unity Project to create an iOS AR game
- import a 3D bottle model
- design and assign materials for the above
- implement physics for the 3D bottle
- create a placement indicator
- add a script to the above
After all that, we still have a few more things to do to our AR carnival shooting gallery. But do not fear our dive into the ARverse, as it is all about the journey. This is just one small step for your education… and one giant leap into your indie game development career.
The complete Unity project for this tutorial is available . All images and models used in this tutorial have been created by yours truly.
This tutorial was implemented in:
- Xcode 10.1
- Unity 2018.3.8f1
Tutorial Outline
- Update Placement Indicator
- Add Object to Place Script
- Shooting Interface
Table of contents
Update Placement Indicator
In my last tutorial, How to Create an AR Shoot ’Em Up Gallery Game Part 2, I advised readers to test out their game so far on their iOS device. If you did so you should have noticed that as you turn your phone the placement indicator doesn’t turn. That’s because the rotation of the pose returned by our ray cast is always going to be oriented to whatever direction the phone was facing when AR Kit started up. It would be better if that placement indicator turned as the phone turned.
To do so, navigate back to your Unity project and double click on your ARTapToPlaceObject.cs script to open it in the code editor. In the UpdatePlacementPose() method’s if statement, instead of using the default rotation that comes with the pose you’ll need to calculate a new rotation based on the camera direction.
Create a variable called cameraForward. This will be the vector that acts sort of like an arrow that describes the direction the camera is facing along the x, y and z-axes. We only need to take into consideration the bearing of the user’s camera and not if it is pointed towards the sky or towards the ground. So you’ll need to create a new variable cameraBearing and assign a new Vector3 using the x component of your camera forward object, 0 for the y component and the x component of your camera forward object. When using vectors to represent the direction you should always use the normalized version of the vector. This gives you the direction as if y was perfectly vertical.
    private void UpdatePlacementPose() {
        var screenCenter = Camera.current.ViewportToScreenPoint(new Vector3(0.5f, 0.5f));
        var hits = new List<ARRaycastHit>();
        arOrigin.Raycast(screenCenter, hits, TrackableType.Planes);

        placementPoseIsValid = hits.Count > 0;

        if (objectPlaced == false) {
	        if (placementPoseIsValid)
	        {
	            placementPose = hits[0].pose;

//<span style="font-weight: 400;" data-mce-style="font-weight: 400;">the vector that acts sort of like an arrow that describes the direction the camera is facing along the x, y and z axes</span>
	            var cameraForward = Camera.current.transform.forward;
//the camera's bearing
	            var cameraBearing = new Vector3(cameraForward.x, 0, cameraForward.z).normalized;
                    placementPose.rotation = Quaternion.LookRotation(cameraBearing);
	        }
	    }
    }
Now if you were to run the project again you would see that the placement indicator turns just the way you want it.
Add Object to Place Script
Now let’s add some user interaction. Game logic is that we wan the user to be able to tap on the screen to place an object. To let your script know which object should be placed you’ll need to create another public variable of type GameObject and call it ObjectToPlace.
public class ARTapToPlaceObject : MonoBehaviour {
    public GameObject objectToPlace;
    public GameObject placementIndicator;

    ...
}
Every time the frame updates you’ll want to check and see if the placement pose is currently valid and whether the user has just touched the screen. In your Update method create an if statement that checks if there is a flat plane to place an object on, if the user has any fingers currently on the screen and if that touch has just begun.
void Update() {
       ...
       //if placement pose is a flat plane, if the user has any fingers currently on the screen and the phase of the finger to see if the touch just began
        if (placementPoseIsValid && Input.touchCount > 0 && Input.GetTouch(0).phase == TouchPhase.Began) {

        }
}
If all these conditions are met the user can actually place the object. To do so, you’ll need to call another new method called PlaceObject().
if (placementPoseIsValid && Input.touchCount > 0 && Input.GetTouch(0).phase == TouchPhase.Began) {
   //call your place object method
    PlaceObject();
}
To place your object you only need one line of code. In your new method clone your object to place game object and give it a position and rotation based on the placement pose.
private void PlaceObject() {
        //clone game object and give it a position and rotation based on the placement pose
        Instantiate(objectToPlace, placementPose.position, placementPose.rotation);
}
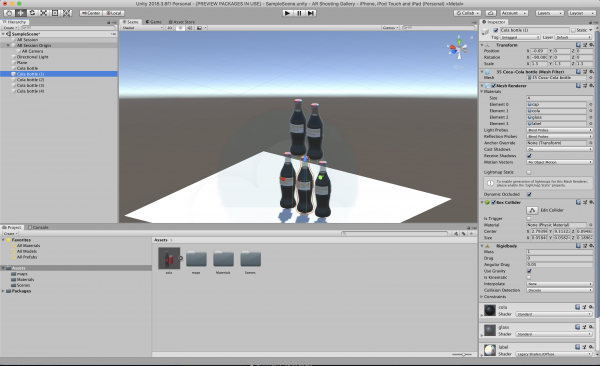
With that done save your code and navigate back to Unity. Before we can assign the bottle pyramid to the object to place parameter let’s clean it up first. The plane that the bottle pyramid sits on is not very attractive and not need for gameplay. So, let’s make it invisible. To do so, make sure said plane is selected then in your Inspector panel deselect the Mesh Render and in the Layer dropdown menu select TransparentFX. Now create prefab of your Parent game object by dragging it into your Assets folder. In your Scene Hierarchy delete the Parent game object.
Now you can assign your Parent prefab to the object to place parameter by selecting the Interaction game object and dragging and dropping the Parent prefab in the object to place parameter.
If you were to run the game again you would see the placement indicator and when you tap the screen the bottles pyramid appears. But the indicator does not go away and if you were to tap the screen repeatedly other bottle pyramids would spawn. To fix this let’s go back into the ARTapToPlaceObject.cs script. You’ll need to create a class boolean variable called objectPlaced and initialize it to false.
public class ARTapToPlaceObject : MonoBehaviour {
    ...

    private bool placementPoseIsValid = false;
    private bool objectPlaced = false;

    ...
}
We only want to place the object if it does not exist in the game world then we can update the placement pose, the placement indicator, and place the object. To indicate the object has been placed, after the PlaceObject() method set the object placed variable to true. You’ll also need to destroy the placement indicator. Just call the Destroy() function after you have set the object placed variable to true.
void Update() {
    	if (objectPlaced == false) {
	        UpdatePlacementPose();
	        UpdatePlacementIndicator();

	        if (placementPoseIsValid && Input.touchCount > 0 && Input.GetTouch(0).phase == TouchPhase.Began ) {
	            PlaceObject();
	            objectPlaced = true;
                    Destroy(placementIndicator);
	        }
	    }
}
The full ARTapToPlaceObject.cs script is below.
using System.Collections;
using System.Collections.Generic;
using UnityEngine;

//imported libaries
using UnityEngine.XR.ARFoundation;
using UnityEngine.Experimental.XR;
using System;

public class ARTapToPlaceObject : MonoBehaviour
{
    public GameObject objectToPlace;
    public GameObject placementIndicator;

    // to interact with the AR Session object you'll need to create a variable to store the AR Session attribute
    private ARSessionOrigin arOrigin;

    //a position where you can place a virtual object. Pose object is a simple data structure the describes the position and rotation of a 3D point
    private Pose placementPose;

    // keep track of hits on flat planes
    private bool placementPoseIsValid = false;
    private bool objectPlaced = false;

    void Start() {
    	// right when your game starts you'll save a reference it
        arOrigin = FindObjectOfType<ARSessionOrigin>();
    }

    void Update() {
    	if (objectPlaced == false) {
	        UpdatePlacementPose();
	        UpdatePlacementIndicator();

                //if placement pose is a flat plane, if the user has any fingers currently on the screen and the phase of the finger to see if the touch just began
	        if (placementPoseIsValid && Input.touchCount > 0 && Input.GetTouch(0).phase == TouchPhase.Began ) {
	            PlaceObject();
	            objectPlaced = true;
                Destroy(placementIndicator);
	        }
	    }
    }

    private void PlaceObject() {
        //clone game object and give it a position and rotation based on the placement pose
        Instantiate(objectToPlace, placementPose.position, placementPose.rotation);
    }


    private void UpdatePlacementIndicator() {

	        if (placementPoseIsValid) {
	            placementIndicator.SetActive(true);
	            placementIndicator.transform.SetPositionAndRotation(placementPose.position, placementPose.rotation);
	        } else {
	            placementIndicator.SetActive(false);
	        }

	}

    // method that will update the placement pose direction and rotation
    private void UpdatePlacementPose() {

        // the ray to be cast
        var screenCenter = Camera.current.ViewportToScreenPoint(new Vector3(0.5f, 0.5f));

        // list of every time the ray hits something
        var hits = new List<ARRaycastHit>();

        // Cast the ray
        arOrigin.Raycast(screenCenter, hits, TrackableType.Planes);

        // is comparable to at least one item in the hit list
        placementPoseIsValid = hits.Count > 0;

	        if (placementPoseIsValid)
	        {
	            placementPose = hits[0].pose;

                    //the vector that acts sort of like an arrow that describes the direction the camera is facing along the x, y and z axes
	            var cameraForward = Camera.current.transform.forward;

                    //the camera’s bearing
	            var cameraBearing = new Vector3(cameraForward.x, 0, cameraForward.z).normalized;
	            placementPose.rotation = Quaternion.LookRotation(cameraBearing);
	        }
    }
}
Shooting Interface
Moving on to the shooting mechanics let develop the visuals. You’ll need a crosshair and shooting button, which will be included with the complete project files. Make sure the Aniso Level is at the max. We do this because we want the best quality image we can get.
Now you’ll need to create the materials for both the crosshair and the shooting button. In your Materials folder, right-click Create > Material rename the new material crosshair. In the Inspector panel from the Shader dropdown menu select Legacy Shader > Diffuse and click the Select button in the Texture field then select the crosshair png from the dialogue box the appears. Once you have selected the texture, go back to the Shader dropdown menu select UI > Default Do the same for the shooting button.
With your buttons ready to go let’s build out the canvas. In the Scene Hierarchy right-click select UI > Canvas. With the Canvas selected navigate to the Inspector Panel from the UI Scale Mode dropdown menu select Scale with Screen Size.
In your Canvas create a button by right-clicking on Canvas and selecting UI > Button. Rename it shoot button. To see your button double click it. It’s not very flashy and it’s in the center of the canvas. Let’s jazz it up with the material we created for it.
You will not need the Text field so go ahead and delete that. With your button selected navigate to the Inspector Panel and in the Source Image field select None. In the Material field select the shot material you created previously.
Your button is way distorted to correct this change the width and the height to 80×80. Now move it to the button right of the screen. Make sure its anchor point is set to the bottom right as well. To do so, click the Anchor Preset icon located in the Inspector Panel and select the icon for the bottom right.
It time to add the crosshair. Right-click on the Canvas select UI > Image and rename the new image crosshair. With the crosshair image selected navigate to the Inspector panel, change the width and the height to 60×60 and in the Material field select the crosshair material you created previously.
There you have it. You just create the graphical interface for your carnival shooting gallery game. You’ll just need to add an explosion asset, which will cause an explosion effect when you shoot the bottle, the glass breaking sound, and the shooting script.
Conclusion
In this tutorial we:
- updated the placement indicator to face the direction the camera is pointing
- placed the bottle pyramid in our game space when the user taps the screen
- stopped the spawning of other bottle pyramids if the user taps the screen repeatedly
- destroyed the placement indicator once the bottle pyramid has been placed in the game space
- laid out the graphical interface by adding a shooting button and crosshair for aiming
Next time on How to Create an AR Shoot ’Em Up Gallery Game Part 4, you will learn how to add an explosion asset – which will cause an exploding effect when you shoot the bottle, a breaking glass sound, and the shooting script.
Go forth into the ARverse like the courageous pioneers Neil Armstrong and Buzz Aldrin, and create more!
“There is only one corner of the ARverse you can be certain of improving, and that’s your own code.” – Morgan H. McKie


