Table of contents
Introduction
Check out the other parts of this series:
In this tutorial, we will be adding in the final components to allow the user to draw in 3D space. We will be going over how to use the Trail Renderer to create a paint stroke effect and how we use the Camera to “draw” the stroke. We will then build our project to the device to see how everything looks and, if we need to, tweak it. We will also be adding in some UI to bring everything together for the user. Then, at the end of this tutorial, we will begin to set up the necessary components to allow the user to draw on a flat surface in real life.
There’s lots of interesting stuff we’re going to be doing, so let’s get started!
Did you come across any errors in this tutorial? Please let us know by completing this form and we’ll look into it!

FINAL DAYS: Unlock coding courses in Unity, Godot, Unreal, Python and more.
Source Code files
You can download the tutorial source code files here.
Part 2 in this series
This tutorial is the second part of a series on AR Foundation in Unity. You can find the previous tutorial here: Part 1. We are using AR Foundation to create a drawing app where users can draw directly into the real world. In the first tutorial, we set up AR Foundation in Unity, built our project to a mobile device, and created the prefabs that we are going to use in this tutorial. Our project is currently able to run on Android or iOS so please check out the first tutorial if you have not!
Drawing in 3D space
The way we are going to draw in 3D space is by simply spawning the “Stroke” prefab at the position of the pen point (the sphere that’s parented to the camera). So open up the “Draw” script and let’s gain access to the pen point and our Stroke prefab by creating two public variables of type “Gameobject”.
using System.Collections;
using System.Collections.Generic;
using UnityEngine;

public class Draw : MonoBehaviour
{
    public GameObject spacePenPoint;
    public GameObject stroke;
    public bool mouseLookTesting;

    private float pitch = 0;
    private float yaw = 0;
Then, let’s create a public boolean that is static (so that we can access it easily from other scripts) called “drawing.”
using System.Collections;
using System.Collections.Generic;
using UnityEngine;

public class Draw : MonoBehaviour
{
    public GameObject spacePenPoint;
    public GameObject stroke;
    public bool mouseLookTesting;

    public static bool drawing = false;

    private float pitch = 0;
    private float yaw = 0;
We will use this to determine if the player is attempting to create a paint stroke. Next, we need to think about how we are actually going to let the player begin to draw in the real world. Should we have a button or should the player just press the screen? I did the latter since buttons on a mobile device tend to clutter the screen space very quickly. Right-click in the hierarchy and create a new panel.

This automatically created a canvas so we need to make sure the canvas will scale with the differing screen size on our devices.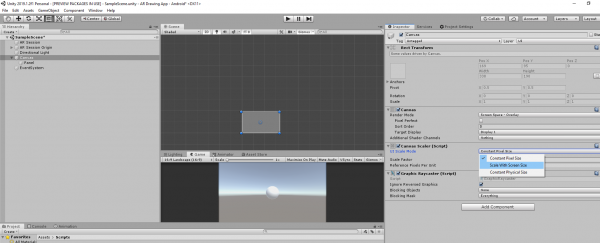
Size the panel so that it covers the entire canvas, set the Alpha to zero (we need it to be invisible),
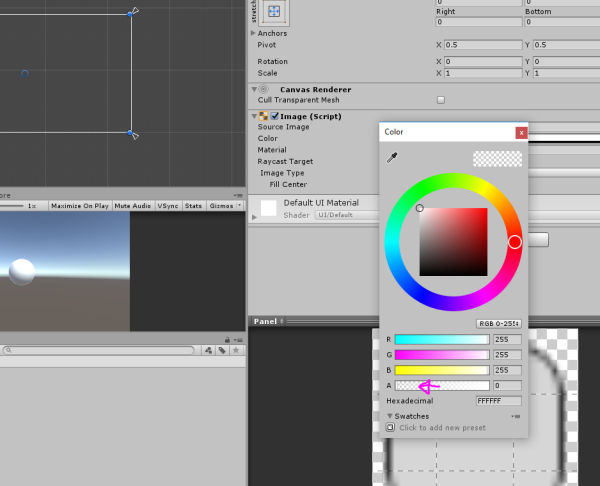
and then add an “Event Trigger” component to this panel.
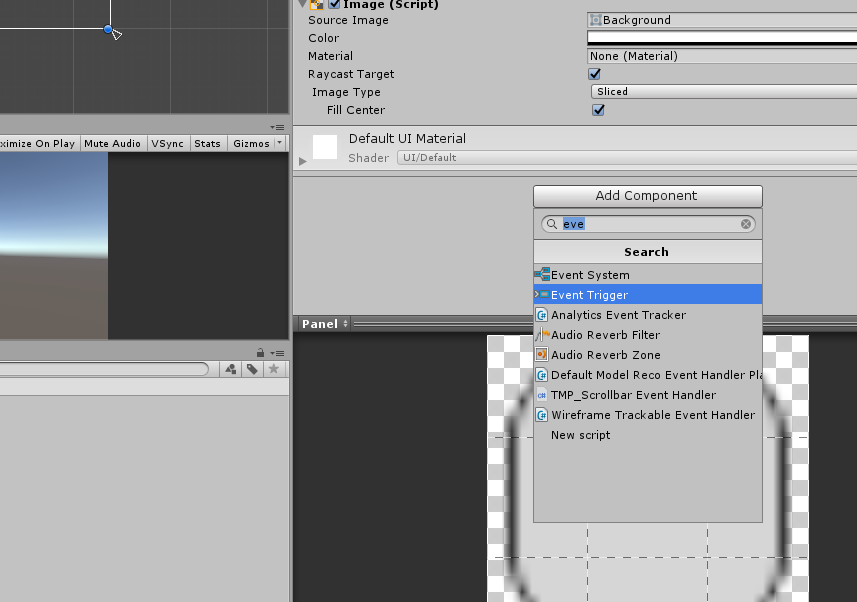
Create a “Pointer Down” event and a “Pointer Up” event.
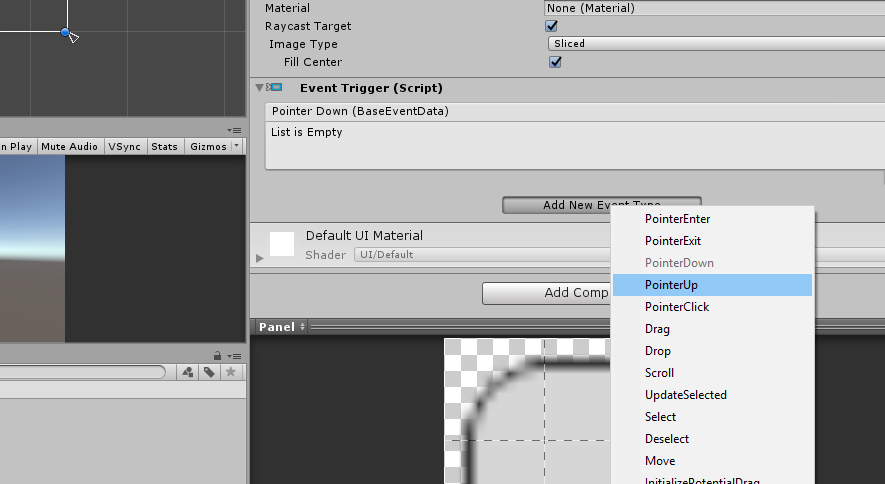
With these, we can call methods on a script. Let’s go back to our Draw script and create two new public methods, “StartStroke” and “EndStroke.” In the StartStroke method, we need to set “drawing” equal to “true” and we need to instantiate the “stroke” prefab at the position of the pen point.
 public void StartStroke()
    {
        GameObject currentStroke;
        drawing = true;
        currentStroke = Instantiate(stroke, spacePenPoint.transform.position, spacePenPoint.transform.rotation) as GameObject;
    }
As you can see, we store the instantiated stroke on a local variable. This is so we can make changes to this stroke very easily. Next, for the EndStroke method, we simply set “drawing” equal to false.
using System.Collections;
using System.Collections.Generic;
using UnityEngine;

public class Draw : MonoBehaviour
{
    public bool mouseLookTesting;
    public GameObject stroke;
    public GameObject spacePenPoint;

    public static bool drawing = false;

    private float pitch = 0;
    private float yaw = 0;

    // Start is called before the first frame update
    void Start()
    {

    }

    // Update is called once per frame
    void Update()
    {
        if (mouseLookTesting)
        {
            yaw += 2 * Input.GetAxis("Mouse X");
            pitch -= 2 * Input.GetAxis("Mouse Y");

            transform.eulerAngles = new Vector3(pitch, yaw, 0.0f);
        }
    }

    public void StartStroke()
    {
        GameObject currentStroke;
        drawing = true;
        currentStroke = Instantiate(stroke, spacePenPoint.transform.position, spacePenPoint.transform.rotation) as GameObject;
    }

    public void EndStroke()
    {
        drawing = false;
    }

 }
Now we can wire these methods to our touch panel.
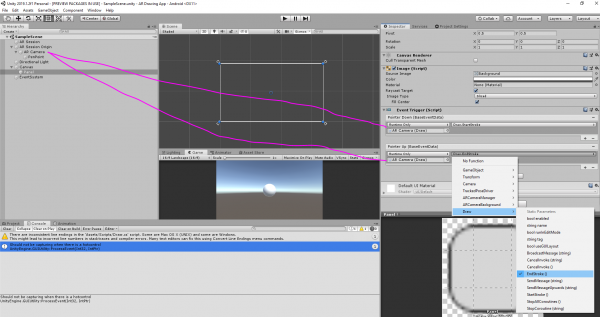
Drag the pen point (our sphere parented to the camera) and the stroke prefab in its correct field on the Draw script,
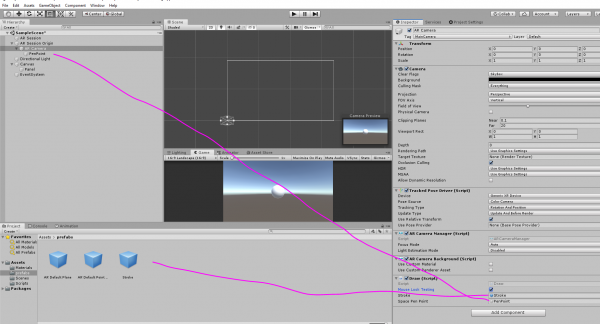
and we’re done with this part. Let’s hit play (with the Mouse Look Testing enabled) and see how we are doing. Click to start drawing and then release to stop.
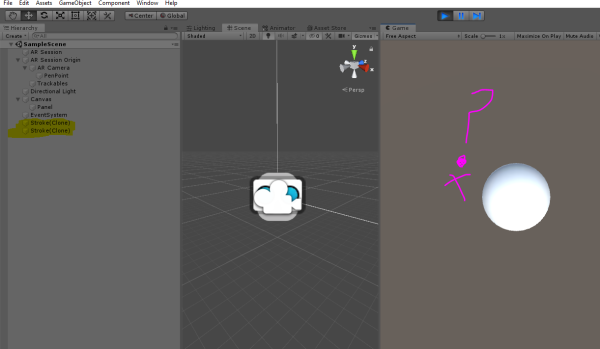
As you can see, we’re able to spawn the stroke prefab but you can’t see it and it doesn’t track with our pen point. To fix this, we need to create a new script called “Stroke” and attach it to our Stroke prefab.
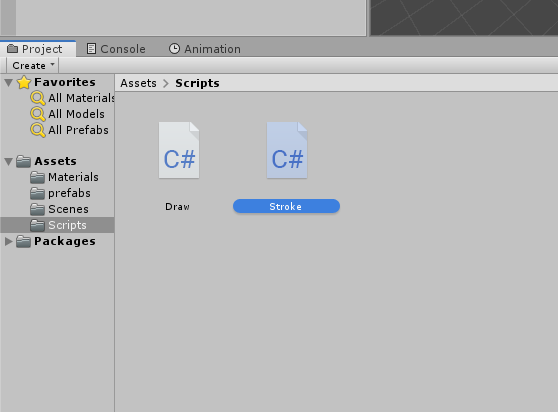
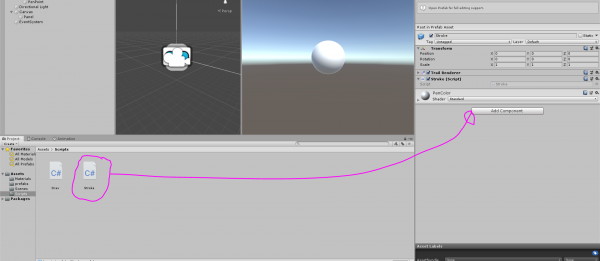
In this script, we will add some logic that will make the stroke track with the transform of our pen point which, in turn, will fix the problem of us not being able to see it. Here is the script:
using System.Collections;
using System.Collections.Generic;
using UnityEngine;

public class Stroke : MonoBehaviour
{
    private GameObject penPoint;

    // Start is called before the first frame update
    void Start()
    {
        penPoint = GameObject.Find("PenPoint");
    }

    // Update is called once per frame
    void Update()
    {
        if (Draw.drawing)
        {
            this.transform.position = penPoint.transform.position;
            this.transform.rotation = penPoint.transform.rotation;
        }
        else
        {
            this.enabled = false;
        }

    }
}
As you can see, we’ve got the transform of the stroke tracking with the transform of the pen point, and we’re disabling the “Stroke” component when we cease drawing. Now, we simply hit play.
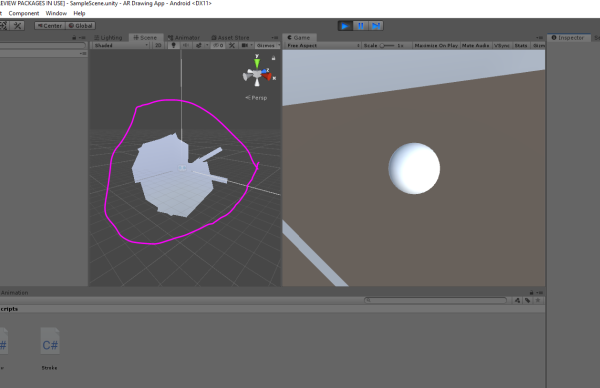
We now are laying down paint strokes in 3D space. As you’ll notice though, these strokes look strange and this is because they’re extremely large. We can change the size of the stroke by going to the Trail Renderer component on the Stroke prefab. Change the “Width” to be about “0.1”.
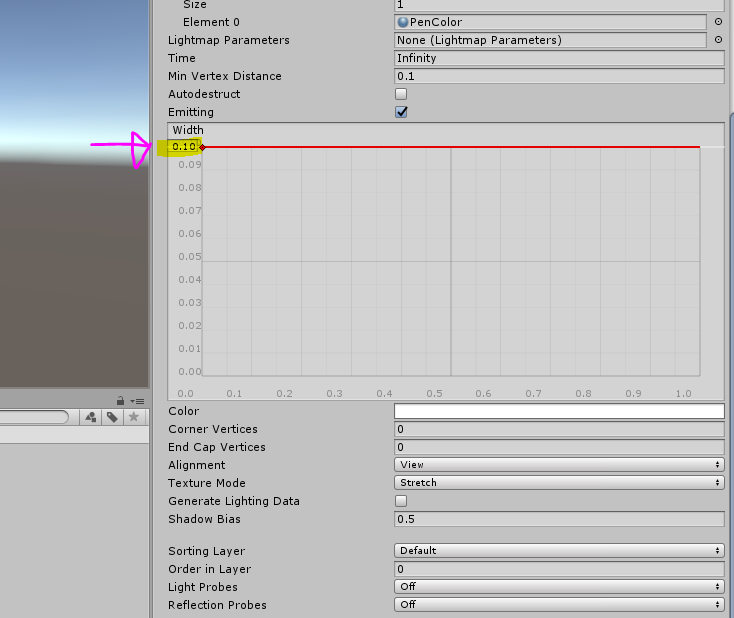
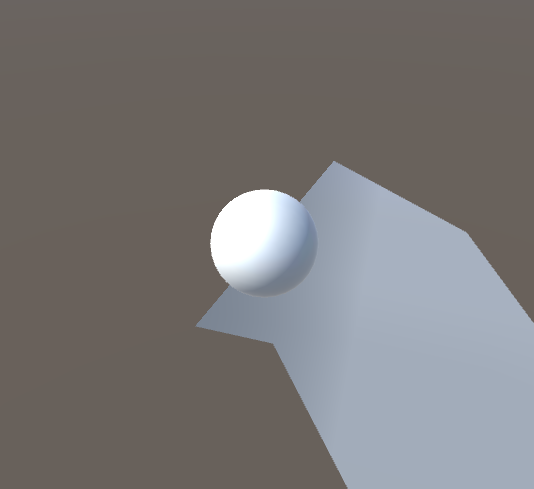
This is an improvement but we need to go much smaller. In fact, the final value that I found worked the best was “0.012”.
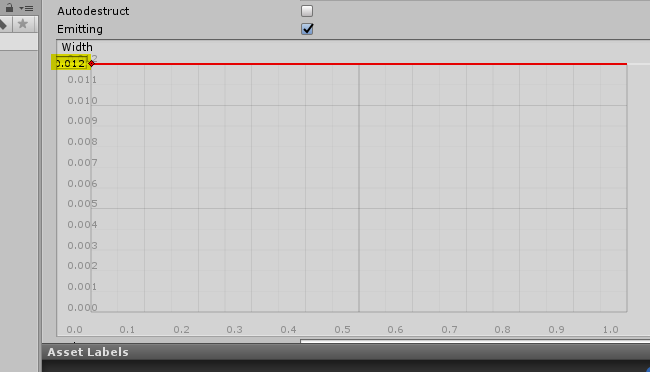
This seems really small but, if we hit play, you’ll see that it actually is about the appropriate size for a paint stroke.
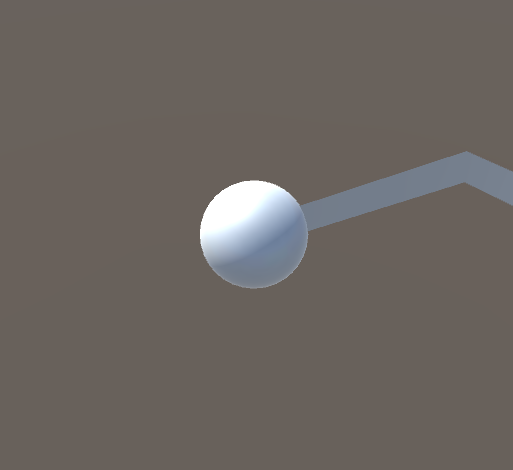
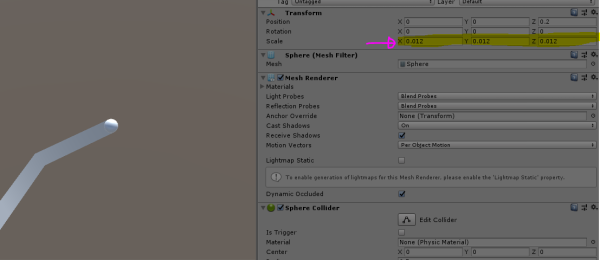
Now, resize the pen point so that it matches the size of our paint stroke.
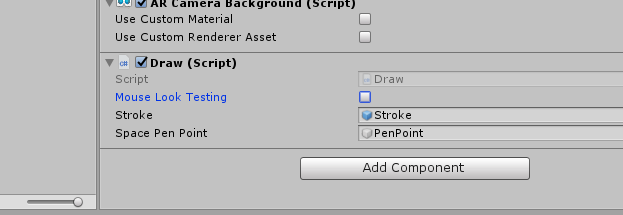
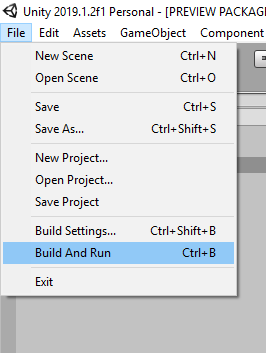
Let’s go ahead and build to our device to see how it looks. Remember to disable “Mouse Look Testing” before exporting your project.
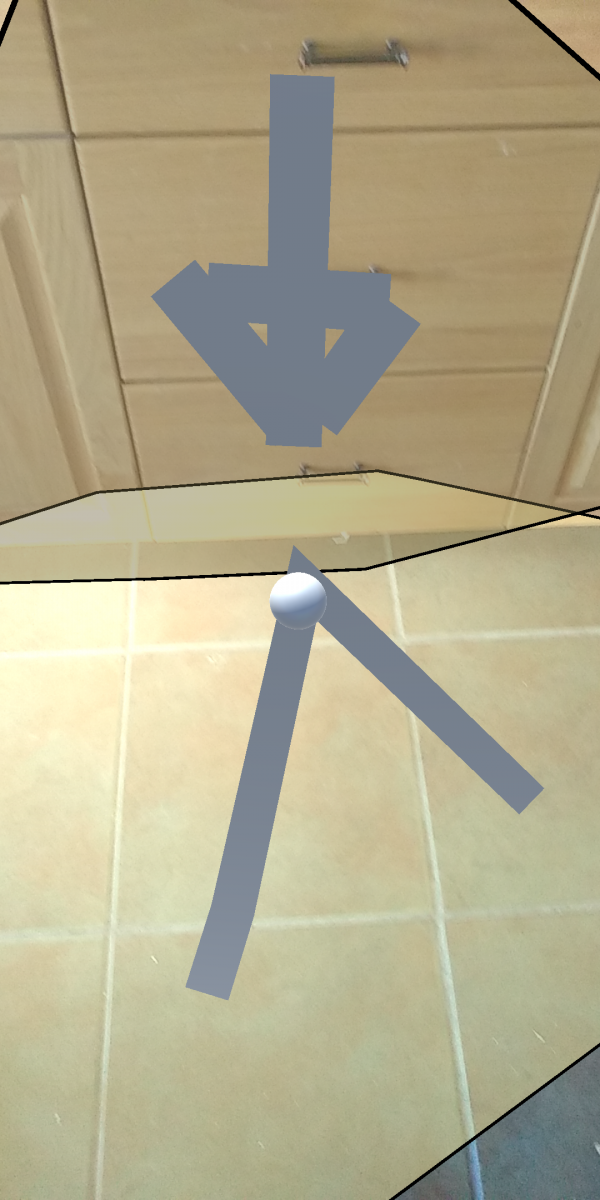
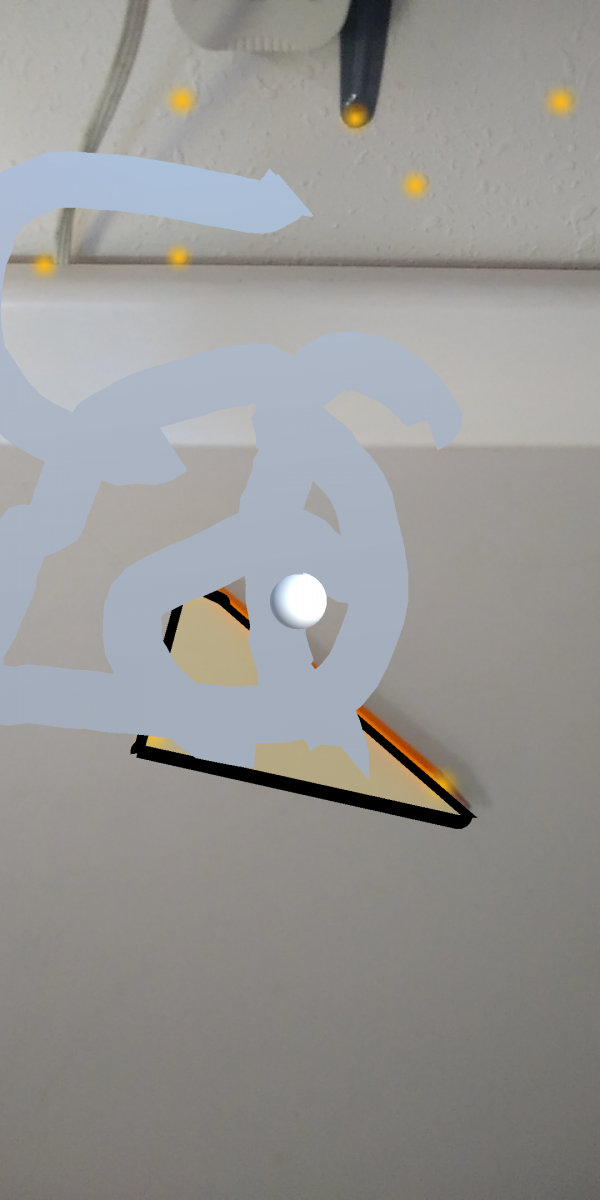
Once you use it a couple of times, you’ll notice that the stroke looks less like a paint stroke and more like a generated mesh. It has harder edges and corners. To fix this, we need to change the “Min Vertex Distance” on the Trail Renderer component.
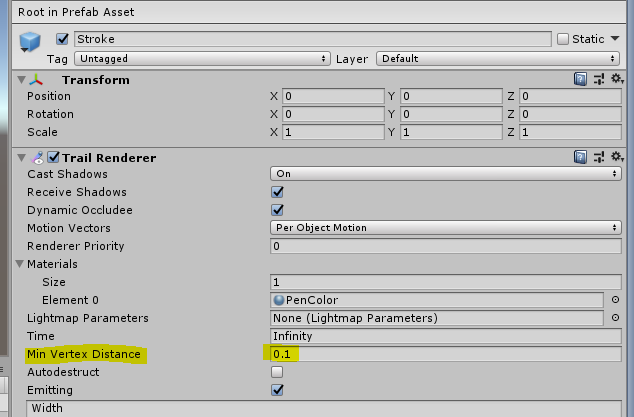
This is the minimum distance between each created vertex in the trail. A smaller value will mean that vertices are closer to each other. This, like the width variable, needs to be very small. I suggest you experiment to find a good value, I found 0.001 to be good enough. Now, you’ll notice, that fixed our problem!
Drawing on a surface: Setting up the UI
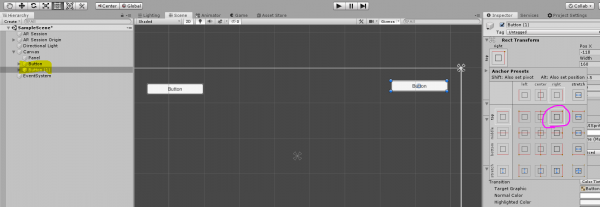
Drawing in 3D space is fairly easy, you simply instantiate a stroke at the position of the 3D pen point. However, we want to be able to draw on an AR detected surface and draw in 3D space. This is a bit more involved with lots of things we need to do in order for it to work. The first thing we need is a UI so that we can switch between drawing in 3D space and drawing on a surface. Create two new buttons in the UI canvas. Drag one to each upper corner on the canvas and then anchor them to that corner.
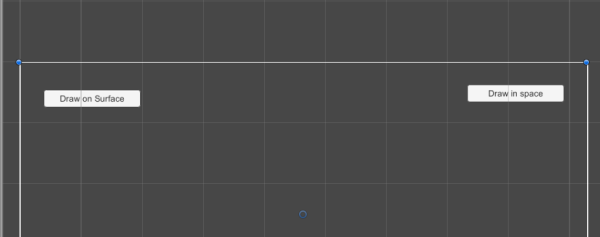
Now, we need one button that says, “Draw in Space” and another which says, “Draw on a surface.”
Next, we need a way to make these buttons actually call certain methods that will switch between our drawing types. We do this by creating a new script called “PenManager” and attaching it to our AR Camera.
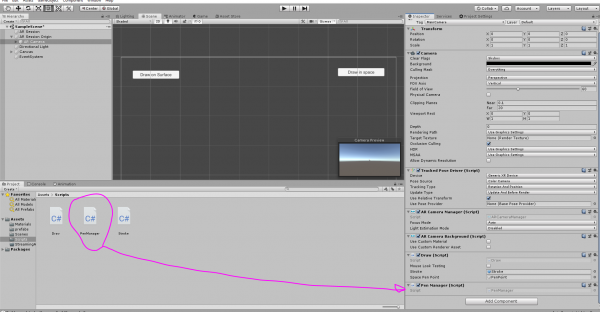
This script will be very simple and it will mainly serve to allow the Unity Editor to make changes to our variables. Here is the code for the PenManager script:
using System.Collections;
using System.Collections.Generic;
using UnityEngine;

public class PenManager : MonoBehaviour
{
    public static bool drawingOnSurface = false;

    public void DrawOnSurface() {
       drawingOnSurface = true;
    }
    public void DrawInSpace() {
        drawingOnSurface = false;
    }
}
We have a public, static boolean that will be used to determine which drawing type we are going to do (either on a surface or in space) and we have two public methods that make changes to this variable. These methods we can now wire to our buttons. Create a new “OnClick” event for each button, drag in the AR Camera into the proper field, and select the appropriate method to call. Now, to make sure everything is working, add some logic in the Update function in the Draw script to tell which drawing type we’re doing.
using System.Collections;
using System.Collections.Generic;
using UnityEngine;

public class Draw : MonoBehaviour
{

    public bool mouseLookTesting;
    public GameObject stroke;
    public GameObject spacePenPoint;
    public static bool drawing = false;

    private float pitch = 0;
    private float yaw = 0;

    // Start is called before the first frame update
    void Start()
    {
    }

    void Update()
    {
        if (mouseLookTesting)
        {
            yaw += 2 * Input.GetAxis("Mouse X");
            pitch -= 2 * Input.GetAxis("Mouse Y");

            transform.eulerAngles = new Vector3(pitch, yaw, 0.0f);
        }
        if (PenManager.drawingOnSurface)
        {
            Debug.LogError("Surface drawing has not been setup yet!");
        }
        else
        {
            Debug.Log("Drawing in 3D space now");

        }

    }

    public void StartStroke()
    {
        GameObject currentStroke;
        drawing = true;
        currentStroke = Instantiate(stroke, spacePenPoint.transform.position, spacePenPoint.transform.rotation) as GameObject;
    }

    public void EndStroke()
    {
        drawing = false;
    }
}
Hit play and watch the console to make sure things are working well so far.


Drawing on a surface: Creating the pen point
Just like our pen point for drawing in 3D, we need a pen point to draw on a surface. This will be similar to our 3D pen point so let’s just simply duplicate our first one.
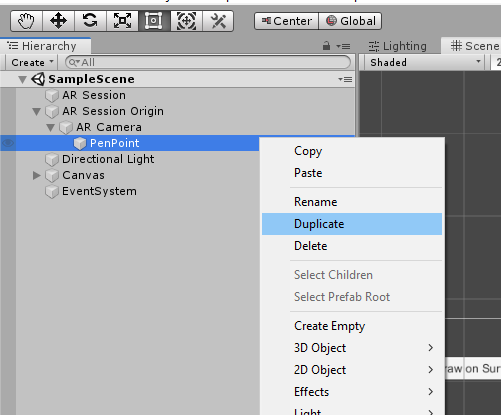
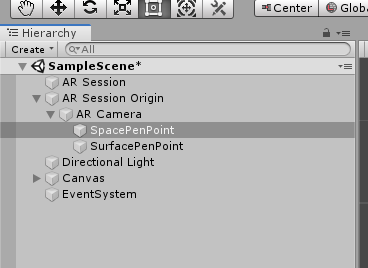
Name it “SurfacePenPoint” and rename the first one “SpacePenPoint.”

Next, we are going to need a new script. Go to your scripts folder and create a new C# script called “DrawOnSurface.”

Attach this to your newly created pen point. Since we’re going to be switching between these two pens, let’s go ahead and make changes to the “Draw” script that will disable and enable the appropriate pen. When we are drawing on a surface, we don’t want to see the 3D pen point. Similarly, when we draw in 3D space, we don’t want to see the surface pen point. To implement this in our script, we need to gain access to each pen point. We already have access to the 3D pen point so let’s grab the surface pen point:
using System.Collections;
using System.Collections.Generic;
using UnityEngine;

public class Draw : MonoBehaviour
{

    public bool mouseLookTesting;
    public GameObject stroke;
    public GameObject spacePenPoint;
    public GameObject surfacePenPoint;
Now, we simply disable the mesh-renderer for the pen point that is not being used. We can do this in our logic statements that we’ve placed in the update function:
void Update()
    {
        if (mouseLookTesting)
        {
            yaw += 2 * Input.GetAxis("Mouse X");
            pitch -= 2 * Input.GetAxis("Mouse Y");

            transform.eulerAngles = new Vector3(pitch, yaw, 0.0f);
        }
        if (PenManager.drawingOnSurface)
        {
            spacePenPoint.GetComponent<MeshRenderer>().enabled = false;
            surfacePenPoint.GetComponent<MeshRenderer>().enabled = true;
        }
        else
        {
            surfacePenPoint.GetComponent<MeshRenderer>().enabled = false;
            spacePenPoint.GetComponent<MeshRenderer>().enabled = true;

        }

    }
And now we just need to assign the Surface Pen Point to its field on the AR Camera, and we can hit play.
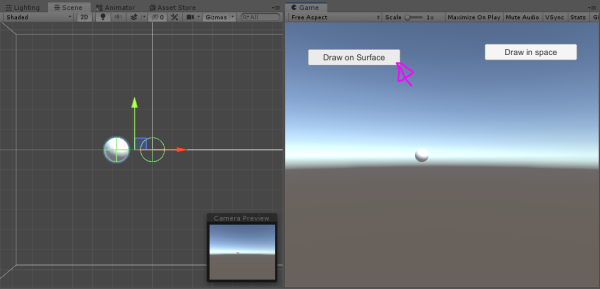
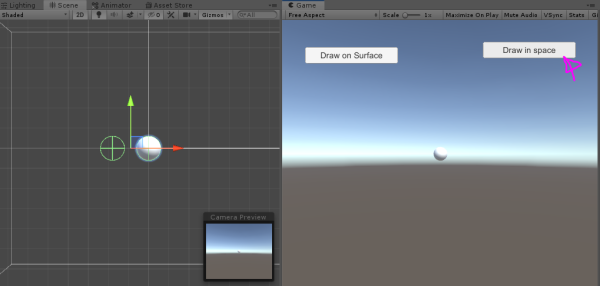
You’ll see that the proper pen point is disabled when we press the buttons.
All Scripts for this tutorial
In case you got lost when I was telling you what needs to be done to your scripts (don’t worry, it’s happened to me many of times), here is each complete script with what we’ve coded so far:
The Draw Script:
using System.Collections;
using System.Collections.Generic;
using UnityEngine;

public class Draw : MonoBehaviour
{

    public bool mouseLookTesting;
    public GameObject stroke;
    public GameObject spacePenPoint;
    public GameObject surfacePenPoint;

    public static bool drawing = false;

    private float pitch = 0;
    private float yaw = 0;

    // Start is called before the first frame update
    void Start()
    {
    }

    void Update()
    {
        if (mouseLookTesting)
        {
            yaw += 2 * Input.GetAxis("Mouse X");
            pitch -= 2 * Input.GetAxis("Mouse Y");

            transform.eulerAngles = new Vector3(pitch, yaw, 0.0f);
        }
        if (PenManager.drawingOnSurface)
        {
            spacePenPoint.GetComponent<MeshRenderer>().enabled = false;
            surfacePenPoint.GetComponent<MeshRenderer>().enabled = true;
        }
        else
        {
            surfacePenPoint.GetComponent<MeshRenderer>().enabled = false;
            spacePenPoint.GetComponent<MeshRenderer>().enabled = true;

        }

    }

    public void StartStroke()
    {
        GameObject currentStroke;
        drawing = true;
        currentStroke = Instantiate(stroke, spacePenPoint.transform.position, spacePenPoint.transform.rotation) as GameObject;
    }

    public void EndStroke()
    {
        drawing = false;
    }
}
The “PenManager” script:
using System.Collections;
using System.Collections.Generic;
using UnityEngine;

public class PenManager : MonoBehaviour
{
    public static bool drawingOnSurface = false;

    public void DrawOnSurface()
    {
        drawingOnSurface = true;
    }
    public void DrawInSpace()
    {
        drawingOnSurface = false;
    }
}
And the “Stroke” script:
using System.Collections;
using System.Collections.Generic;
using UnityEngine;

public class Stroke : MonoBehaviour
{
    private GameObject penPoint;

    // Start is called before the first frame update
    void Start()
    {
        penPoint = GameObject.Find("PenPoint");
    }

    // Update is called once per frame
    void Update()
    {
        if (Draw.drawing)
        {
            this.transform.position = penPoint.transform.position;
            this.transform.rotation = penPoint.transform.rotation;
        }
        else
        {
            this.enabled = false;
        }

    }
}
Conclusion
We have now reached the end of the second part of this series. We currently have the ability to draw in 3D space, and this feature, in its self, is very fun to use. I had a lot of fun experimenting with drawing in “real life.”
Drawing in space is fun, but that’s not where we are going to finish. Instead, we are going to go a step further and draw on a detected flat surface. So that we can, in essence, draw on the walls and the floor. We have already started to implement this feature, and we will finish it up in the next, and final, installment in this tutorial series.
In the next tutorial, we will go over how to raycast in AR Foundation, how to manage the transform of multiple pen points, and even how to change the color of our paint strokes. Lots of exciting things to add to the already exciting things we are doing. So, start improving your painting skills, because we are about to put a paintbrush in your phone. See you in the next lesson!
Keep making great games!
